Configure these new features for WSL and experience full Linux without a virtual machine
Windows Subsystem for Linux (WSL), Microsoft's subsystem for supporting Linux environments under the Windows platform, has been a hit with major developers since its introduction.
If you are also a deep learning researcher, most of the new articles in the research community are based on research experiments in Linux environments, while the computers we use every day are Windows platforms. A normal Linux virtual machine cannot access the graphics card to get deep learning acceleration. On the other hand, some of the research experiments open source their toolkit, but they are developed in a Linux desktop environment and are not available on a Linux server.
Now, over time, WSL has seen its share of enhancements, namely WSL2, NVIDIA CUDA on WSL, and WSLg, each of which addresses different development challenges for WSL in the above scenarios.
「Microsoft loves Linux」
This post is a tutorial guide to installing and configuring WSL to make it work with the new features mentioned above.
The complete Linux experience with second generation WSL
Main differences
There are currently two major versions of WSL, called WSL1 and WSL2. The major difference is that WSL1 is based on dynamic translation of Linux system calls into Windows NT (the kernel of the Windows operating system) system calls, while WSL2 is virtual machine-based, creating a full Linux kernel.
The problem that developers have encountered with WSL1 is that some linux commands do not run successfully. This is a very annoying thing when you encounter this problem. For example, WSL1 could not run docker successfully because it required linux system calls about namespaces, which WSL1 did not support. Eventually, Microsoft decided to use virtualization technology to overcome this problem.
A comparison of other key features between WSL1 and WSL2 can be found in the table in this Microsoft document.
WSL2 is significantly better than WSL1 in terms of the number of features supported, with the exception of the item of cross-OS file system performance. Later we will illustrate how to avoid cross-OS file access to avoid performance problems, based on actual paths.
Enable WSL2
First of all, WSL2 can be enabled in Windows 11 or Windows 10, Version 1903, Build 18362 or higher version numbers.
Method 1: Command line method. There is no quicker way than the command line to enable and install a single command, wsl --install. This command will help the user to enable the necessary system components, download the latest Linux kernel, set WSL2 as the default version, and download and install Ubuntu as the initial version.
If you want more granular control over the installation options, you can enable them manually using way two below.
Mode 2: Graphics tab. Since the WSL2 implementation is based on a virtual machine format, there are two key components that need to be opened in the Windows Features menu, "Virtual Machine Platform" and "Windows Subsystem for Linux". Otherwise there is no way to create a disk, boot and enter WSL2, while WSL1 only needs to have "Windows Subsystem for Linux" open.

After restarting the computer, the new feature checked will be activated. Open a terminal and enter the command wsl --set-default-version 2 to set the WSL version to use WSL2.
- PS C:\Users\someone> wsl --set-default-version 2 For information on key differences with WSL 2 please visit https://aka.ms/wsl2 The operation completed successfully.
Installing a Linux distribution should go without saying, with a single click through the Windows App Store.
By default, both installation methods will install WSL to the system disk. If you want to install WSL to a non-system drive, you can refer to this article below.
WSL2 cross-system access to files
Since WSL2 is now a virtual machine, the formerly convenient Explorer access to the Linux directory tree is no longer easy to find, as shown above, it is all consolidated into one virtual disk ext4.vhdx file.
However, the Linux directory tree can be accessed via the smb protocol by typing \\wsl$\Ubuntu-20.04\home\user in explorer, or you can bind it to a network location for quick access.
Caption: dotfiles XDG Base Directory Specification
Being able to use the system's explorer to access the VM's files is really handy. In my usage scenario, I would use it to view the images generated by the results of the experiment run to initially determine the effectiveness of the target detection. Until then, I need to start an HTTP service to view them or make a copy via scp to the local machine to view them.
WSL's graphic pigtail: WSLg
Caption: Figure source https://github.com/microsoft/wslg
WSLg is a technology stack developed by Microsoft to bring Linux GUI applications senselessly into the Windows operating system. In simpler terms, it is possible to run a graphical application for Linux from the Start menu without the user perceiving that it is actually running in WSL2.
Previously, to run Linux graphical applications, we needed to install a full Linux desktop system using a physical/virtual machine to do so. A bit more advanced would require an XServer installation on the Windows side and then rendering the graphical via X11 forward forward forwarding.
WSLg implements the same functionality and is much more feature-rich. First, without the need for a full desktop system environment, WSLg is lighter and only includes the display server (X Window Manager). Secondly, the XServer only supports applications such as X11 App, while WSLg further supports Wayland App. Finally, the WSLg solution introduces a native remote desktop solution for RDP to display GUI applications, enabling maximum support for a number of Windows habits such as copy-paste switching of applications.
If you want to experience the current software ecosystem under Linux, WSLg is one of the most richly supported solutions out there, and you can also uninstall WSL2 completely afterwards, clean and fresh.
Install WSLg
WSLg should be enabled in Windows 11 or later, note that Windows 10 users will not be able to use this feature.
The installation of WSLg is much simpler and is actually included in the above steps. When you run wsl --install, WSLg is also installed. As you can see below, I did a fresh install and the components required by WSL were automatically installed, and then I only had to reboot the system to start the feature. For those who already have WSL2 installed, you can run wsl --update.
Caption: Note that it needs to be run with administrator privileges
You can install x11-apps via apt and then run xeyes to confirm the installation was successful.
However, WSLg doesn't work perfectly for all graphics applications either, and there are quite a few posts on the web indicating that most of the difficulties many users have encountered point to systemd and graphics driver related issues. This can also be used as your initial judgment to see if WSLg will meet your needs.
Practical applications
In my day job, I also need to perform data analysis on experimental data. I often use python to call the matplotlib library to illustrate my papers, and WSLg makes it easy to render and display the drawn illustrations directly, so I can quickly iterate to adjust the details of the illustrations.
Up until this point, I've been doing the mapping through Google Colab. But when experimenting with more and larger artifacts, it took a lot of effort to figure out how to sync the artifacts to Colab's runtime, or to have Colab use the local runtime to access the artifacts via port forwarding, but either way, it wasn't as straightforward and convenient as WSLg.
Caption: using my favorite sine function for the demo
For many GUI applications that have Linux as their first priority support, I think it is also well worth using WSLg, for example, the famous simulation software GAZEBO, the robotics package ROS, the bioinformatics tool Blast, etc.
Caption:showcases
If you happen to be practicing and familiarizing yourself with Linux, then I recommend installing and using the app Timeshift. It creates a backup of the path you specify as a restore point, and then you can toss WSL2 around to learn Linux and quickly restore it if you run into problems.
Caption: source Timeshift's github home page
If you're in the habit of reading ebooks on your computer, and you've heard the jargon that "Windows font rendering is terrible," try the somewhat better font-rendering Linux reader Foliate. It's a bit of a curveball, but it's not a bad solution.
Caption: Source Foliate Home Page
Attack of the WSL with CUDA
CUDA, or "Compute Unified Device Architecture", is a parallel computing development kit for Nvidia's GPU graphics cards. CUDA is a development kit that provides direct access to the stream processors in the GPU to perform large and repetitive simple calculations more efficiently.
Since GPUs are more powerful than CPUs for parallel computing, they are more suitable for tasks such as matrix computing, graphics rendering, etc. Deep learning techniques, which are currently very popular, rely heavily on CUDA because of the heavy use of matrix computation.
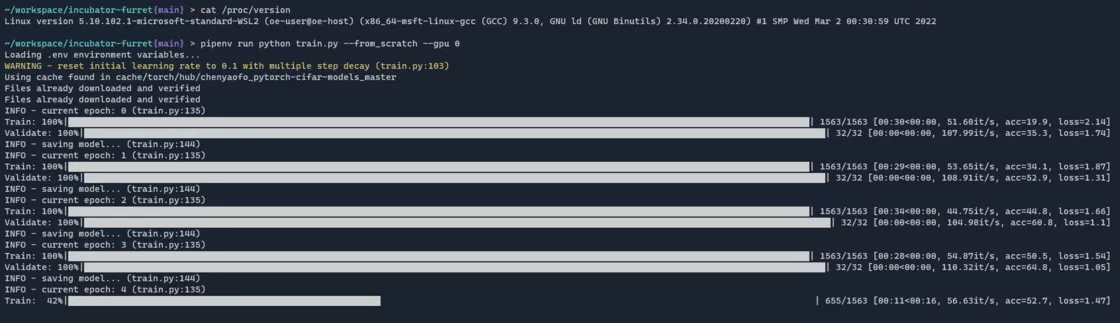
I need to work on deep learning techniques in my day job, and now that WSL also supports CUDA, it's easier for me to reduce the need for a server, write the basic code and run tests on a local machine, and then sync to the server for large-scale experiments.
Install CUDA
CUDA on WSL can be enabled in Windows 11 or Windows 10, Version 21H2 and higher.
Many students read the Microsoft and Nvidia documentation related to CUDA on WSL and are still confused. Apart from the fact that there are a lot of English descriptions, it's also because neither of them tells you in a concise manner that the whole installation process is actually very simple for the user.
The entire installation process can be broken down into three steps.
- upgrading the Linux kernel on the Windows side.
- install Nvidia's graphics card drivers.
- install the development kit for Nvidia CUDA within WSL.
Caption: A simple diagram of the architecture
The first step is to upgrade the Linux kernel, which needs to be discussed here in three cases.
- If you installed WSL fresh with the above steps, then you can skip this step as the initial installation is the latest kernel version.
- If you use Windows on a daily basis with automatic updates turned on (up to 21 days off), then you don't have to upgrade either, as it will do it for you on a daily basis.
- If you really need to install it manually, the
wsl --installcommand does it in one click.
Finally you can confirm that the kernel version is greater than 5.10.43.3 by using the wsl cat /proc/version command.
- PS C:\Users\someone> wsl cat /proc/version Linux version 5.10.102.1-microsoft-standard-WSL2 (oe-user@oe-host) (x86_64-msft-linux-gcc (GCC) 9.3.0, GNU ld (GNU Binutils) 2.34.0.20200220) #1 SMP Wed Mar 2 00:30:59 UTC 2022
The second step is to install the Nvidia graphics card drivers. This is actually already installed on most PCs configured with Nvidia graphics cards, otherwise you won't be able to use the graphics card's features properly at all. If you can see Nvidia GeForce Experience in the system tray, then you have installed it. If not, go to the Nvidia driver website and select your graphics card model to download the installer all the way to the next point.
Although Nvidia doesn't say exactly what version number is required, only mentioning that the latest drivers can support it. But personally I would also recommend manually updating to the latest version occasionally for more stable and efficient driver performance and higher gaming performance.
Step 3: Install Nvidia's CUDA development kit. WSL-Ubuntu&target_version=2.0&target_type=deb_local) has kindly treated WSL as a standalone Linux distribution, so you can install the CUDA development kit by selecting the options shown below and following the instructions shown below. The whole process is no different from any other distribution installation, and there is no additional learning cost at all.
From a deep learning user's perspective, I don't recommend mindlessly installing the latest CUDA version unless one is clear on what the scope of impact is. In general, using deep learning environments such as pytorch and tensorflow with the recommended version installed on the official website will get the least buggy experience. Therefore, the recommended version on the CUDA official website, select Archive of Previous CUDA Releases to get the installation instructions for historical releases.
Running commands such as nvidia-smi under WSL will confirm that the CUDA package is correctly installed.
At this point, you have installed all the dependencies for CUDA under WSL and can install and use it normally as a normal Linux environment Deep learning environment now.
Practical applications
Like most deep learning researchers, I generally use CUDA to run deep learning applications. In the WSL environment, the coding experience is exactly the same as on the server side, but since I don't have to think about time-sharing the GPU with my classmates, coding and testing are able to alternate more frequently. The difference in running speed was also not noticeable with the same RTX2080Ti graphics card.
Similarly, Intel and AMD have CUDA equivalent development kits, oneAPI and ROCm respectively. www.intel.com/content/www/us/en/developer/tools/oneapi/overview.html#gs.53ka13) and ROCm. Microsoft and Intel have each announced support for oneAPI in WSL2 in their blogs, but nothing about ROCm has been seen yet. Readers who have a need for the other two's hardware can explore them.
postscript
There are so many different software features, but the constant is that what works for you is what works for you. If you have similar needs and want to juggle a lot of common software on your Windows system, then WSL2 is ideal from this point of view, so give it a try. Feel free to leave your comments in the comments section about any pain points and more suitable scenarios and software recommendations for using WSL2.
Associated Reading.